RDS Postgres Source Setup Guide
Supported Postgres versions
ClickPipes supports Postgres version 12 and later.
Enable Logical Replication
You can skip this section if your RDS instance already has the following settings configured:
rds.logical_replication = 1wal_sender_timeout = 0
These settings are typically pre-configured if you previously used another data replication tool.
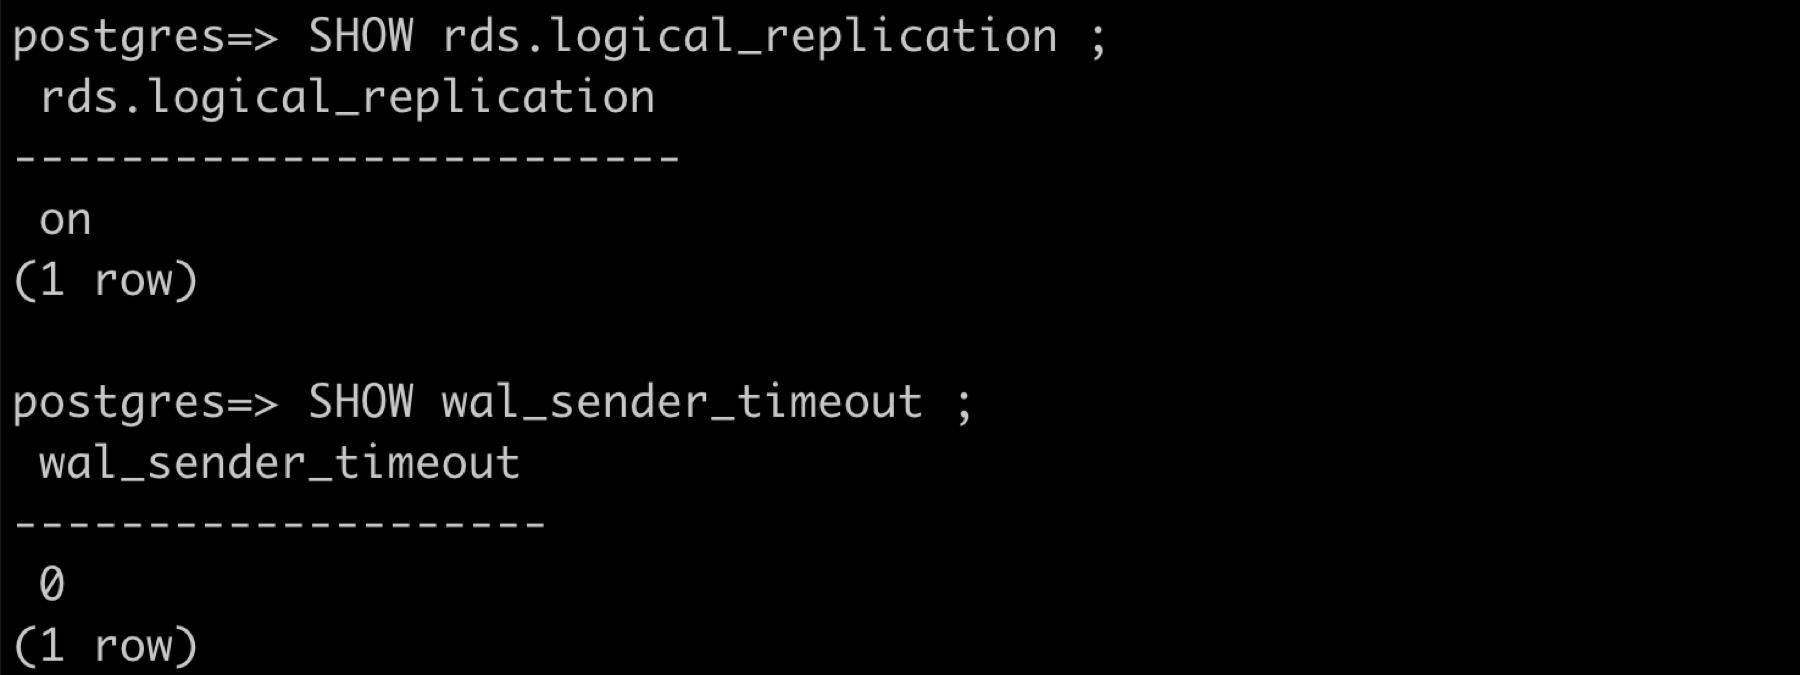
If not already configured, follow these steps:
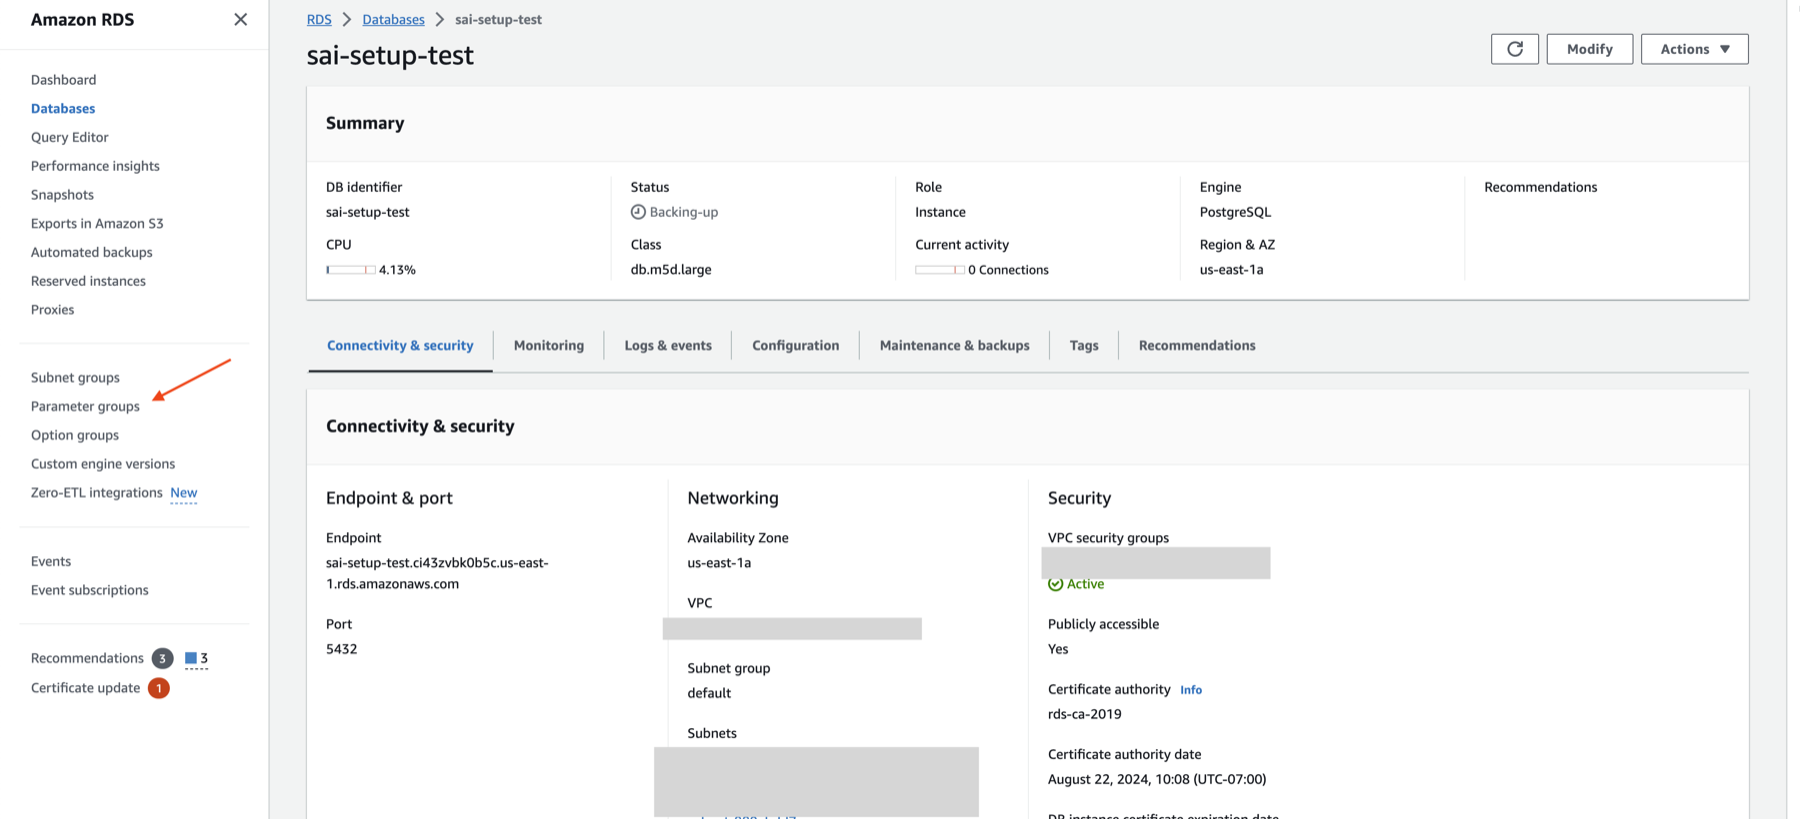
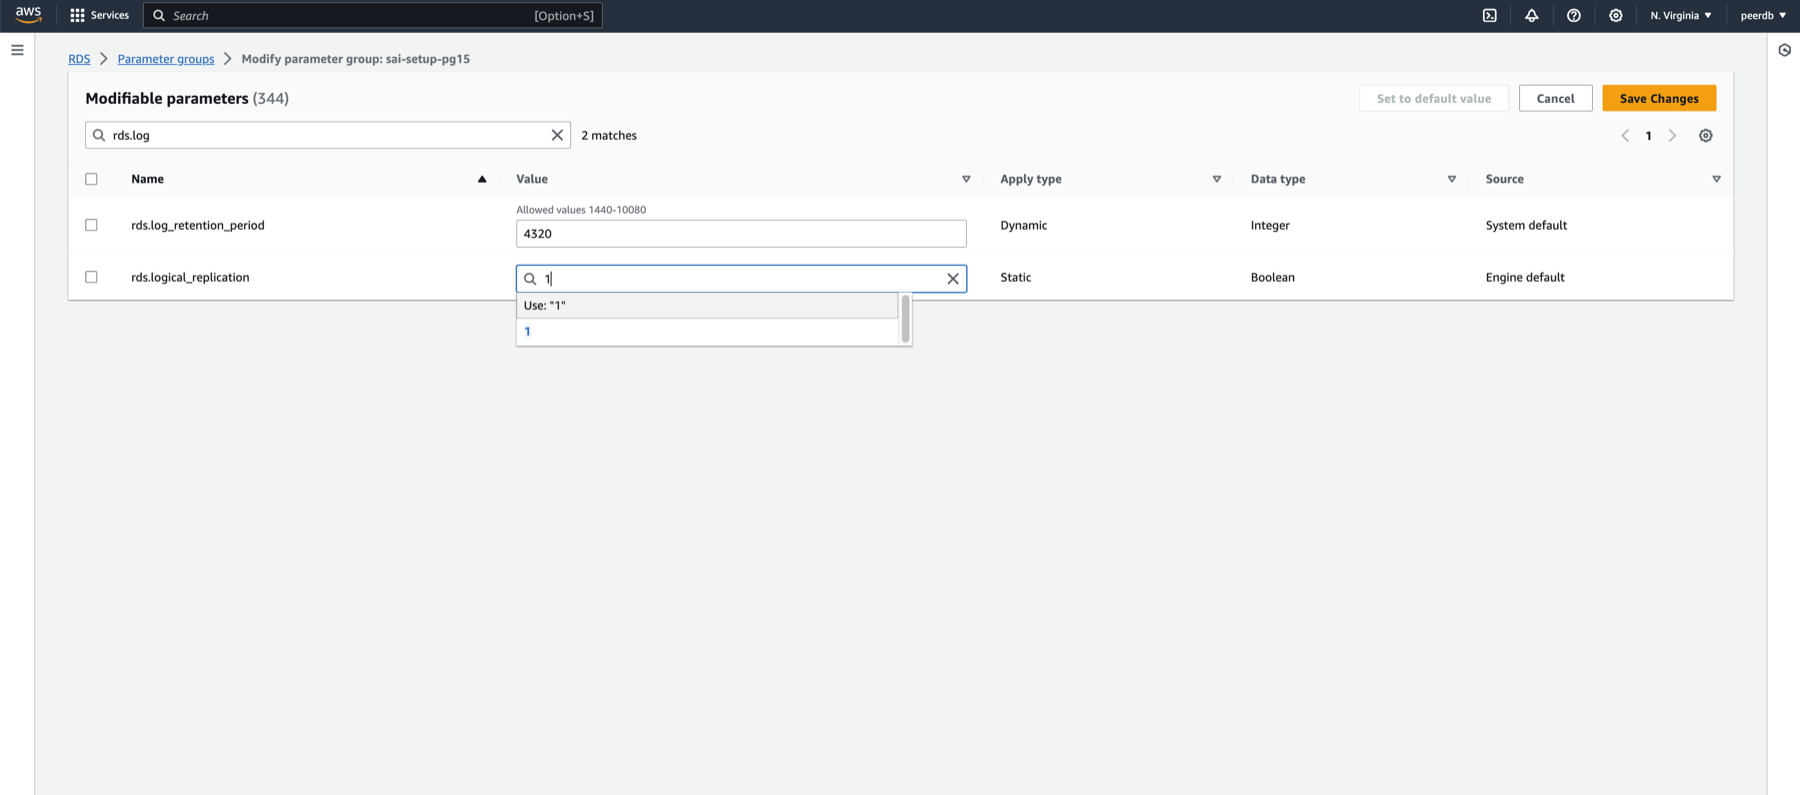
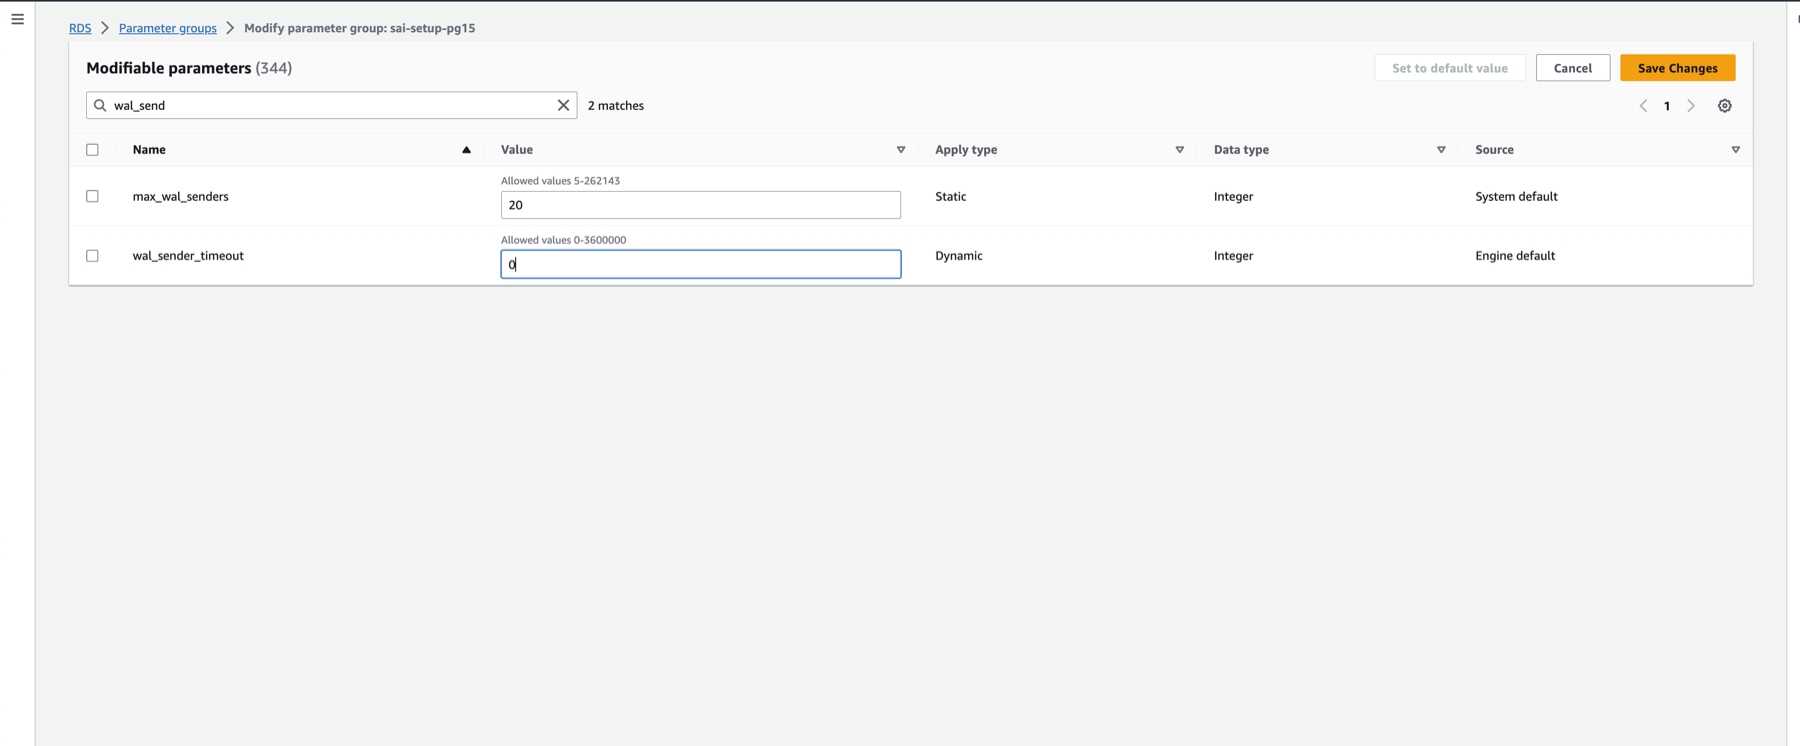
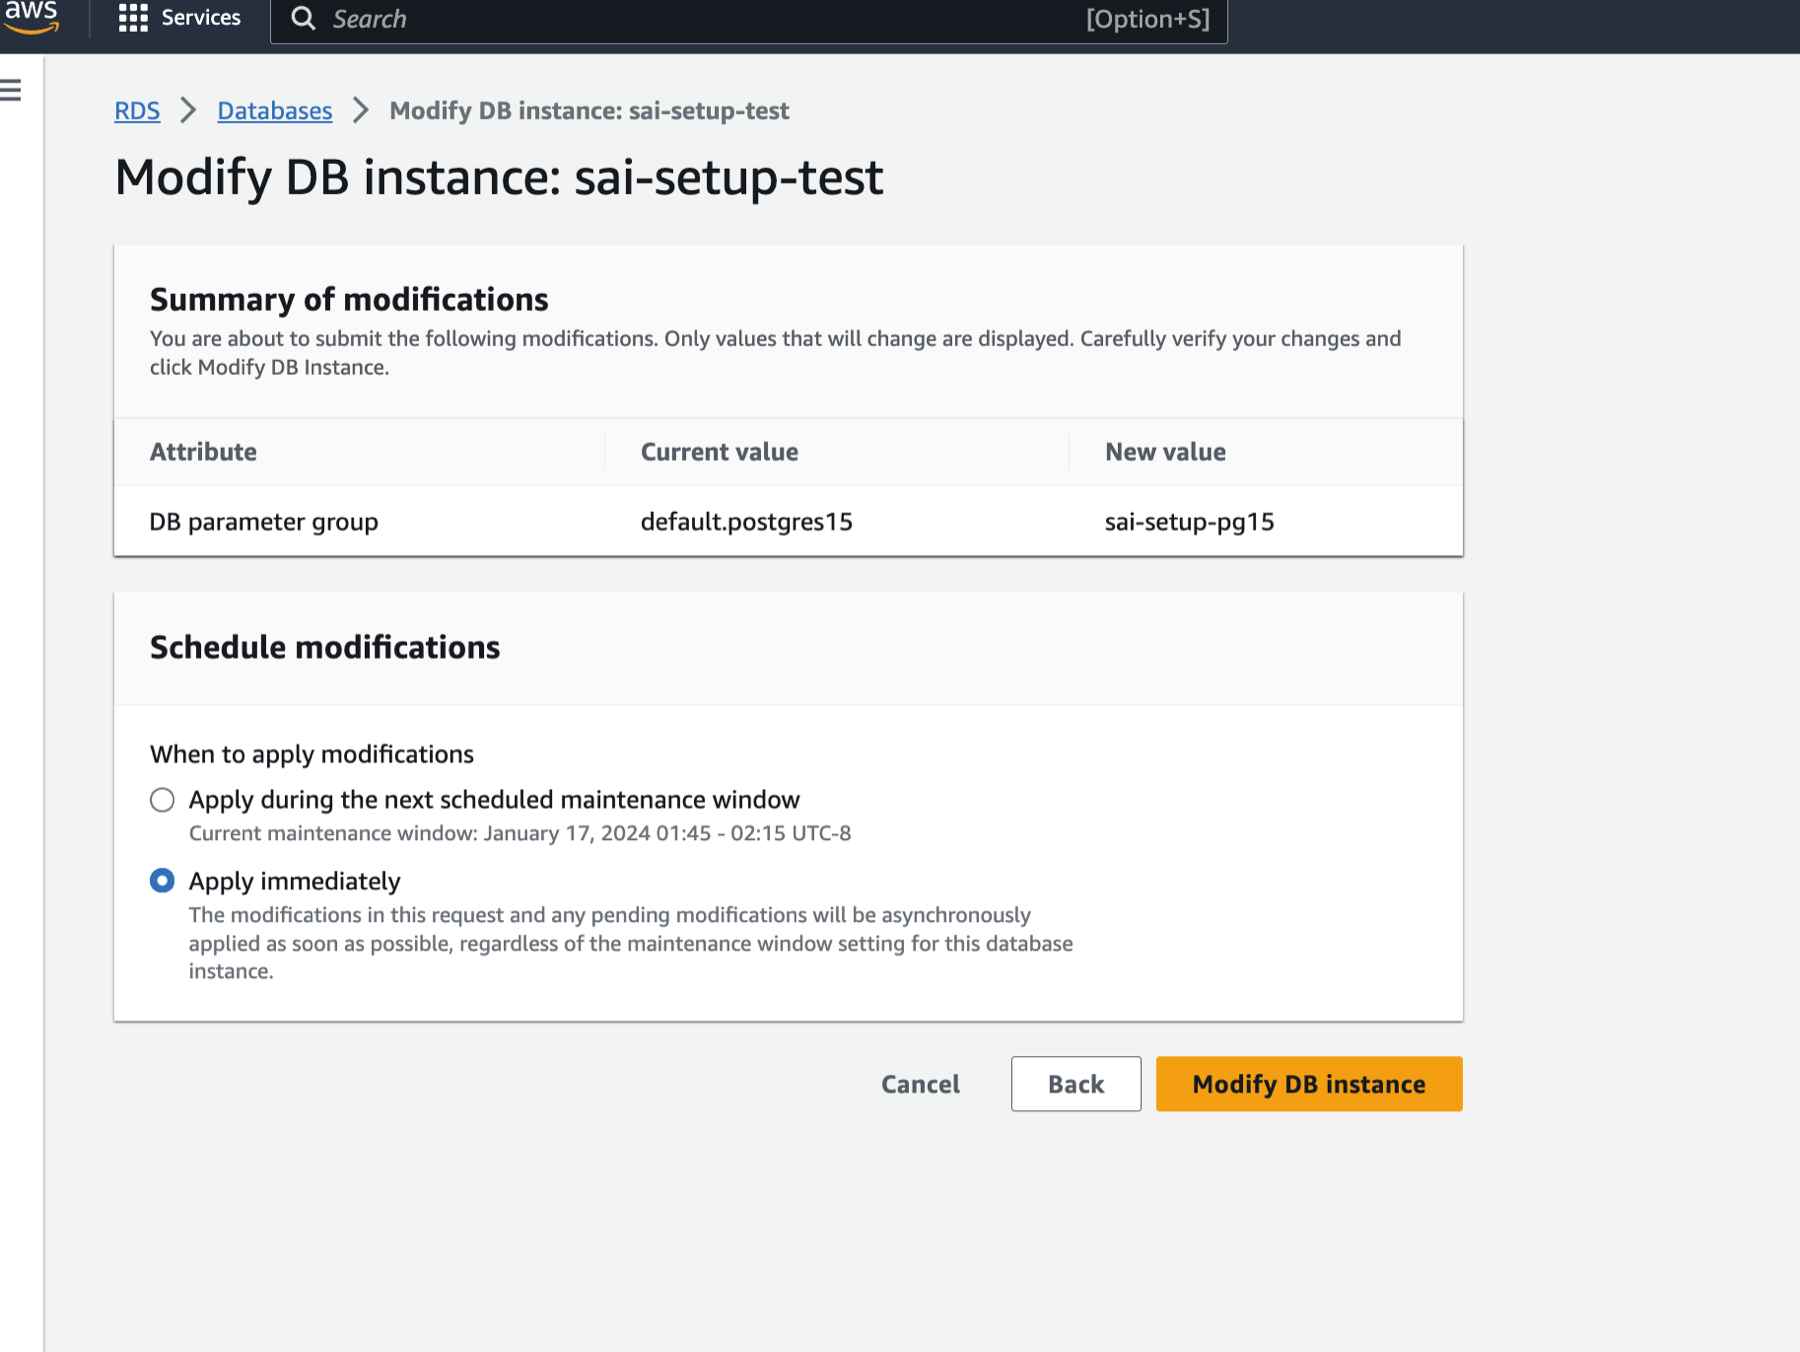
Create a new parameter group for your Postgres version with the required settings:
- Set
rds.logical_replicationto 1 - Set
wal_sender_timeoutto 0
- Set
Apply the new parameter group to your RDS Postgres database
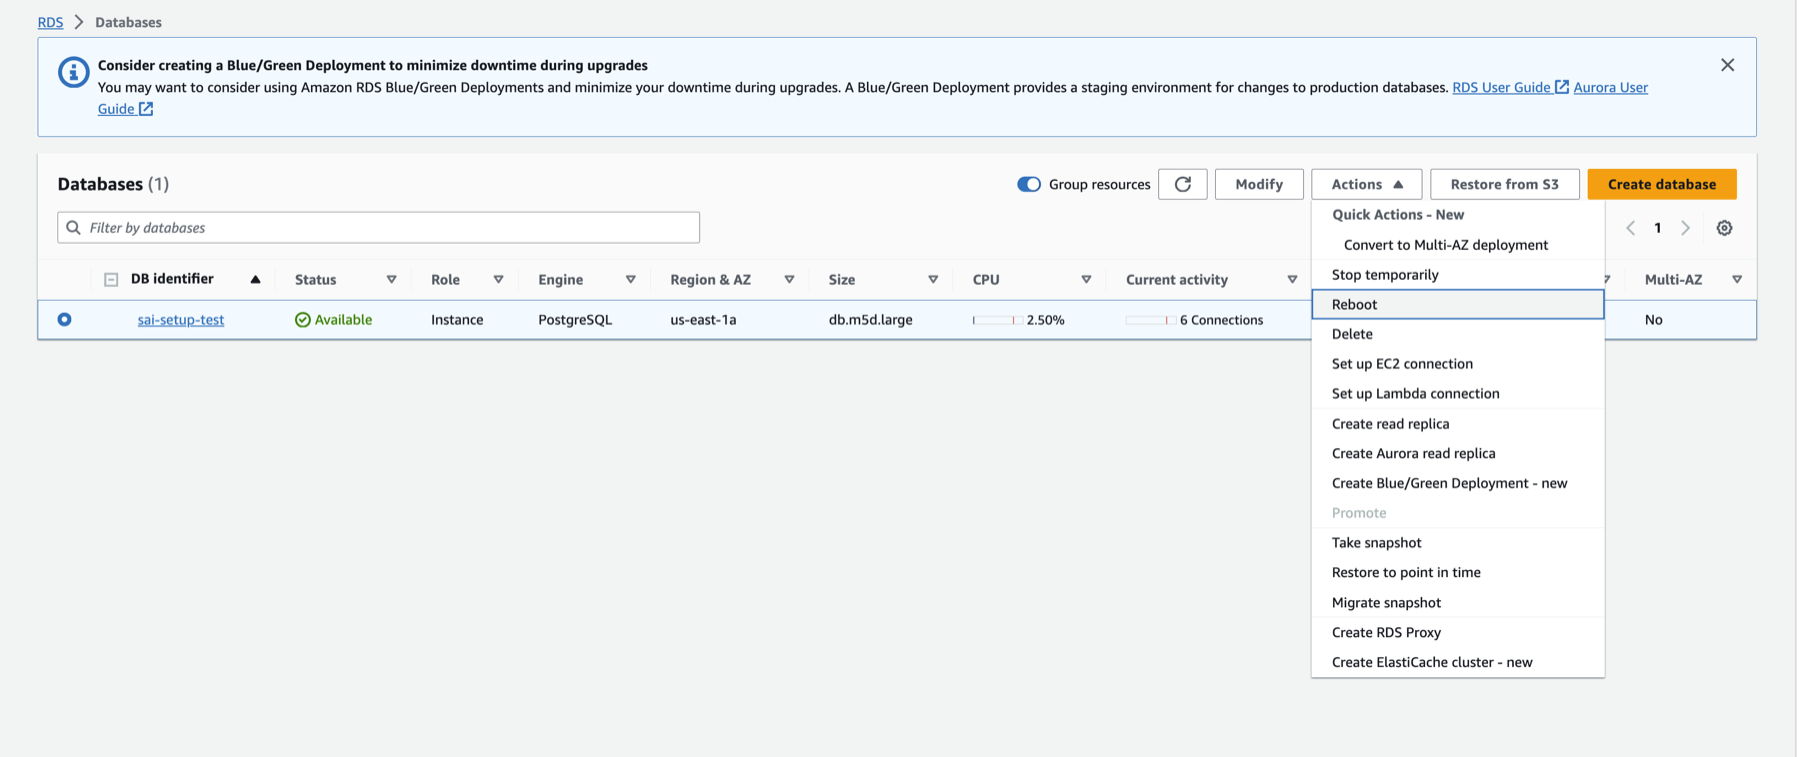
Reboot your RDS instance to apply the changes
Configure Database User
Connect to your RDS Postgres instance as an admin user and execute the following commands:
Create a dedicated user for ClickPipes:
CREATE USER clickpipes_user PASSWORD 'some-password';Grant schema permissions. The following example shows permissions for the
publicschema. Repeat these commands for each schema you want to replicate:GRANT USAGE ON SCHEMA "public" TO clickpipes_user;
GRANT SELECT ON ALL TABLES IN SCHEMA "public" TO clickpipes_user;
ALTER DEFAULT PRIVILEGES IN SCHEMA "public" GRANT SELECT ON TABLES TO clickpipes_user;Grant replication privileges:
GRANT rds_replication TO clickpipes_user;Create a publication for replication:
CREATE PUBLICATION clickpipes_publication FOR ALL TABLES;
Configure Network Access
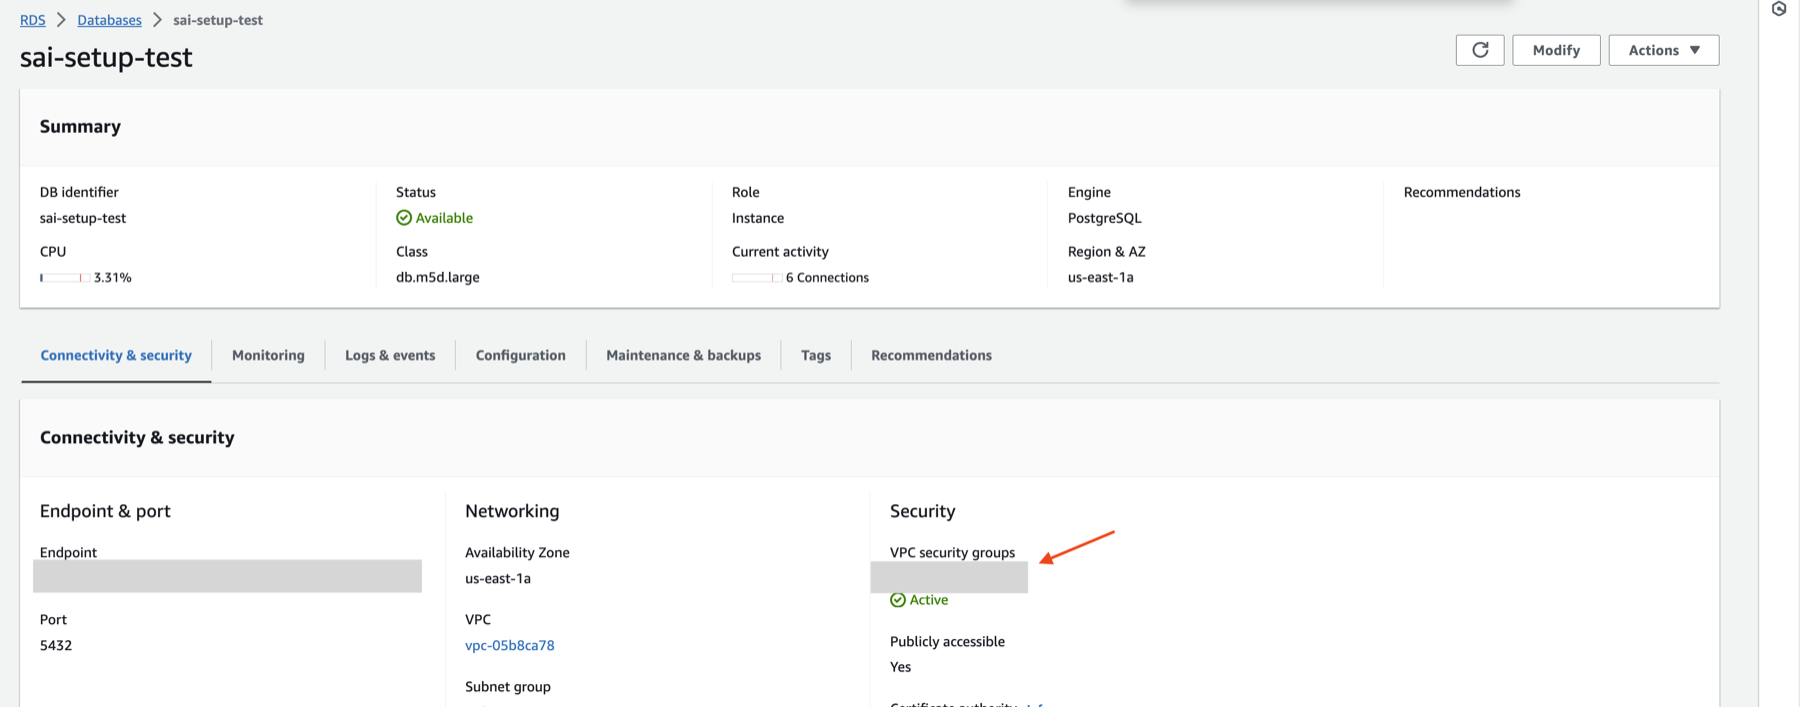
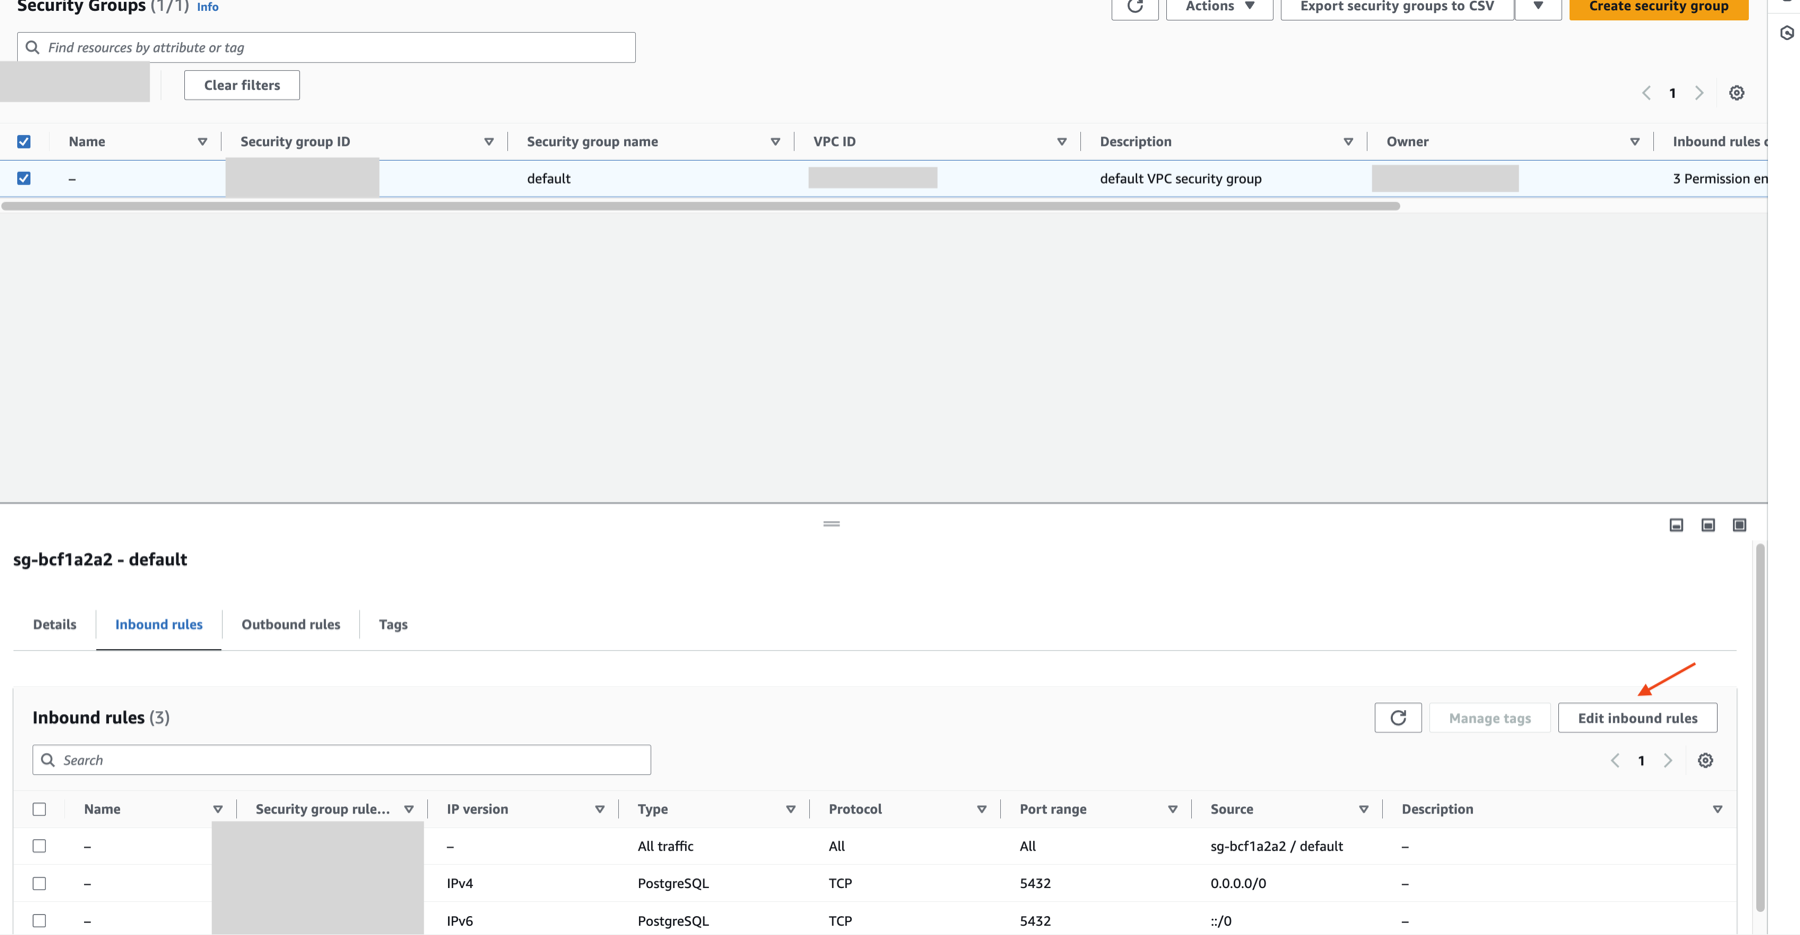
If you want to restrict traffic to your RDS instance, please add the documented static NAT IPs to the Inbound rules of your RDS security group.
What's next?
You can now create your ClickPipe and start ingesting data from your Postgres instance into ClickHouse Cloud. Make sure to note down the connection details you used while setting up your Postgres instance as you will need them during the ClickPipe creation process.